You spent $1,200 on a garage floor coating kit. You watched the YouTube tutorials. You prepped all weekend. Three months later, the coating is peeling off in sheets — curling up from the edges like sunburned skin. You're standing in your Florida garage, staring at a floor that looks worse than it did before you started, wondering what went wrong.
Here's the answer nobody gave you: moisture. Not the kind you can see or feel. Not a puddle or a leak. The invisible, relentless moisture vapor that rises through your concrete slab every single day — driven upward by Florida's uniquely punishing combination of high water tables, limestone geology, and tropical humidity. It's the silent killer of garage floor coatings in the Sunshine State, and it destroys more epoxy installations than every other failure mode combined.
At Proven Surfaces, founder John McGuire has seen hundreds of failed garage floor coatings across Tampa Bay. The pattern is always the same: no moisture testing, no mitigation, and a coating that was doomed before the first roller touched the concrete. This article explains the science behind the problem, how professionals test for it, and why understanding moisture vapor transmission is the difference between a floor that lasts two decades and one that fails in two months.
Moisture vapor transmission destroys more epoxy installations in Florida than every other failure mode combined. It's the problem nobody talks about — and the one that matters most.
The Hidden Enemy Beneath Every Florida Garage Floor
Concrete looks solid. It feels solid. But under a microscope, concrete is a labyrinth of interconnected capillary pores — millions of microscopic channels that run from the bottom of the slab to the top surface. These channels act like tiny straws, wicking moisture from the ground below and transporting it upward through the slab in a process called moisture vapor transmission (MVT).
In most climates, MVT is manageable. The amount of moisture moving through the slab is small enough that most coating systems can handle it without issue. But Florida isn't most climates. In Florida, MVT is a relentless, year-round force that can push enough moisture through a garage floor slab to destroy any coating that isn't specifically engineered to handle it.
The moisture doesn't arrive as water you can see. It arrives as vapor — water in its gaseous state — migrating upward through the concrete's capillary network. When it reaches the underside of an impermeable coating like epoxy, it can't escape. Pressure builds. The vapor condenses back into liquid water at the coating-concrete interface. And then the coating lifts. Sometimes slowly, over weeks and months. Sometimes dramatically, with large sections peeling away overnight after a heavy rain.
Why Florida Is Different: The Perfect Storm for Floor Failure
Every state has concrete slabs. Every state has some level of ground moisture. So why does Florida destroy garage floor coatings at a rate that would shock contractors in Colorado or Michigan? The answer lies in four geological and climatic factors that converge nowhere else in the continental United States.
The High Water Table
Florida's water table sits dangerously close to the surface — often just 2 to 6 feet below grade in coastal areas of Tampa Bay, Clearwater, St. Petersburg, and the surrounding Gulf Coast communities. In some neighborhoods, the water table is less than 18 inches below the bottom of the garage slab. That means the source of moisture isn't deep underground — it's right there, pressing against the underside of your concrete, 365 days a year.
Compare this to a state like Arizona, where the water table may sit 100 to 300 feet below the surface. A garage slab in Scottsdale has hundreds of feet of dry soil between it and groundwater. A garage slab in Pinellas County might have two feet. The moisture drive in Florida isn't just higher — it's orders of magnitude more intense.
Limestone Substrate
Much of Florida sits on a foundation of porous limestone — the remnants of ancient coral reefs and seabeds. Limestone is essentially a natural sponge. It absorbs and transmits water with remarkable efficiency, creating a direct hydraulic connection between the water table and the bottom of your concrete slab. Where other states have dense clay or rock substrates that act as natural moisture barriers, Florida's limestone actively conducts moisture upward.
No Basements
In northern states, homes typically have basements — deep foundations that extend well below the frost line. These basements create separation between the living space and groundwater, and they often include waterproofing systems, drainage tiles, and sump pumps. Florida homes don't have basements. The garage slab sits directly on grade, with nothing between the concrete and the moisture-saturated earth below except (in the best case) a layer of gravel and a poly vapor barrier — which is frequently damaged, improperly installed, or missing entirely.
Tropical Humidity and Afternoon Thunderstorms
Florida's average relative humidity hovers between 70% and 90% for most of the year. During the summer wet season (June through September), afternoon thunderstorms dump inches of rain almost daily. This surface water saturates the soil and raises the water table even higher, intensifying the moisture drive through the slab. Meanwhile, the high ambient humidity means the concrete surface can't dry out effectively — the air above the slab is already nearly saturated with moisture, so there's no evaporative pull to draw moisture upward and away from the concrete.
The result is a concrete slab that is constantly wet from below and can't dry from above. It's the worst possible scenario for any coating system that creates an impermeable film on the surface.
Florida's garage slabs are constantly wet from below and can't dry from above. It's the worst possible scenario for any coating that creates an impermeable film on the surface.
The Science: How Moisture Vapor Transmission Destroys Coatings
Understanding MVT at a technical level helps explain why some coatings survive and others fail catastrophically. Here's what's happening inside your concrete slab.
Capillary Action and Vapor Drive
Concrete's pore structure creates capillary action — the same phenomenon that allows a paper towel to absorb water against gravity. Liquid water is drawn upward through the slab's microscopic pore network by surface tension. As it nears the top of the slab, temperature and pressure differentials cause the liquid water to transition to vapor. This vapor continues to migrate upward, driven by the difference in relative humidity between the wet interior of the slab and the drier air above it.
In an uncoated slab, this vapor simply escapes from the surface into the air. The concrete breathes. But when you apply an impermeable coating — like epoxy — you seal the top of the slab. The vapor has nowhere to go. It accumulates at the concrete-coating interface, condensing back into liquid water and building pressure.
Hydrostatic Pressure: The Bond Breaker
The pressure created by trapped moisture vapor is called hydrostatic pressure. In Florida's high-moisture environment, this pressure can reach levels that exceed the bond strength of most coating systems. The epoxy isn't failing because it's a bad product — it's failing because the force pushing it off the concrete from below is greater than the force holding it down.
Hydrostatic pressure doesn't attack uniformly. It finds the weakest points in the bond line — typically areas where surface preparation was inadequate, where the concrete was slightly damp during application, or where pinholes in the coating provide nucleation points for pressure buildup. These weak points become the starting zones for delamination, which then propagates outward as moisture continues to accumulate.
The Alkalinity Factor
There's an additional chemical dimension to moisture-driven failure. When water migrates through concrete, it dissolves calcium hydroxide — a naturally occurring byproduct of cement hydration. This creates a highly alkaline solution (pH 12-13) that reaches the coating interface. Many coating systems, particularly water-based and low-solids epoxies, cannot withstand prolonged exposure to this alkaline solution. The alkali attacks the resin matrix, softening the coating and accelerating delamination. In the industry, this is known as alkaline-induced disbondment, and it's one of the primary reasons coatings fail on Florida slabs even when initial adhesion appears adequate.
Testing Methods: How Professionals Measure Concrete Moisture
You cannot see moisture vapor transmission. You cannot feel it. You cannot guess whether your slab has a moisture problem. The only way to know is to test — and there are two industry-standard methods that professionals use before every coating installation.
ASTM F2170: Relative Humidity Testing (The Gold Standard)
ASTM F2170 is the most accurate and widely accepted method for measuring moisture in concrete slabs. Here's how it works in plain English:
- Drill test holes. Small holes (approximately 5/8" diameter) are drilled into the concrete slab to a depth of 40% of the slab thickness. For a typical 4-inch garage slab, that's about 1.6 inches deep.
- Insert RH probes. Calibrated relative humidity probes are placed inside the holes and sealed with caps to isolate them from ambient air.
- Wait 72 hours. The probes must equilibrate with the internal moisture conditions of the concrete for a minimum of 72 hours before readings are taken. This ensures the measurement reflects the true internal RH of the slab, not surface conditions.
- Read the results. After equilibration, the probes provide a relative humidity reading expressed as a percentage. Most coating manufacturers specify a maximum acceptable RH level — typically 75% RH for standard epoxy systems, though some moisture-tolerant systems can handle up to 85-90% RH.
The reason ASTM F2170 is the gold standard is that it measures moisture inside the slab, not just at the surface. Surface conditions can be misleading — a slab can feel dry on top while harboring dangerously high moisture levels at depth. The 40% depth measurement captures the moisture that will eventually reach the coating interface after the slab equilibrates post-installation.
ASTM F1869: Calcium Chloride Test
The older calcium chloride test (sometimes called the "moisture dome" test) measures the moisture vapor emission rate (MVER) from the concrete surface. A sealed dish of anhydite calcium chloride is placed on the clean concrete surface under a plastic dome for 60-72 hours. The weight gain of the calcium chloride indicates how much moisture vapor is escaping from the slab, expressed in pounds per 1,000 square feet per 24 hours.
The industry threshold for most coatings is 3 lbs/1,000 sq ft/24 hours. Readings above this level indicate excessive moisture that must be mitigated before coating.
While ASTM F1869 is still widely used, it has a significant limitation: it only measures surface moisture emission, which can be influenced by ambient conditions, HVAC operation, and recent weather. ASTM F2170 provides a more complete picture of the slab's internal moisture condition, which is why most major coating manufacturers now require or prefer F2170 testing.

Solutions: How Professionals Handle High-Moisture Florida Slabs
Identifying the moisture problem is only half the battle. The other half is solving it. Professional contractors have several proven strategies for installing durable coatings on Florida's moisture-compromised slabs.
Moisture Mitigation Epoxy Primers
The most common professional solution is a dedicated moisture mitigation primer — a specialized epoxy system designed to block moisture vapor transmission before the decorative coating is applied. These primers are formulated with high-density resin systems that penetrate deep into the concrete's pore structure and cure to form a continuous, vapor-impermeable barrier.
Professional-grade moisture mitigation primers can handle internal RH levels up to 100% — meaning they can be applied to even the wettest Florida slabs with confidence. The primer is applied directly to the diamond-ground concrete as the first coat in the system. After it cures (typically 12-24 hours), it creates a sealed foundation that blocks all moisture vapor from reaching the decorative layers above.
Vapor Barriers (Below-Slab)
For new construction, the most effective long-term moisture solution is a below-slab vapor barrier — a heavy-gauge polyethylene sheet (typically 10-15 mil) installed directly beneath the concrete during the pour. When properly installed with sealed seams and penetrations, a below-slab vapor barrier eliminates moisture vapor transmission entirely by creating a physical barrier between the water table and the concrete.
Unfortunately, most existing Florida homes were built without adequate vapor barriers, or with barriers that were damaged during construction. For retrofit applications on existing slabs, topside moisture mitigation primers are the practical solution.
The Professional System Stack
On a high-moisture Florida slab, a professional coating system from Proven Surfaces follows this sequence:
- Diamond grinding to CSP 2-3 — opens the pores and creates mechanical bond profile
- ASTM F2170 moisture testing — quantifies the moisture condition
- Moisture mitigation primer — blocks vapor transmission (if RH exceeds 75%)
- 100% solids epoxy base coat — provides adhesion, chemical resistance, and build thickness
- Decorative layer — flake broadcast, metallic pigment, or solid color
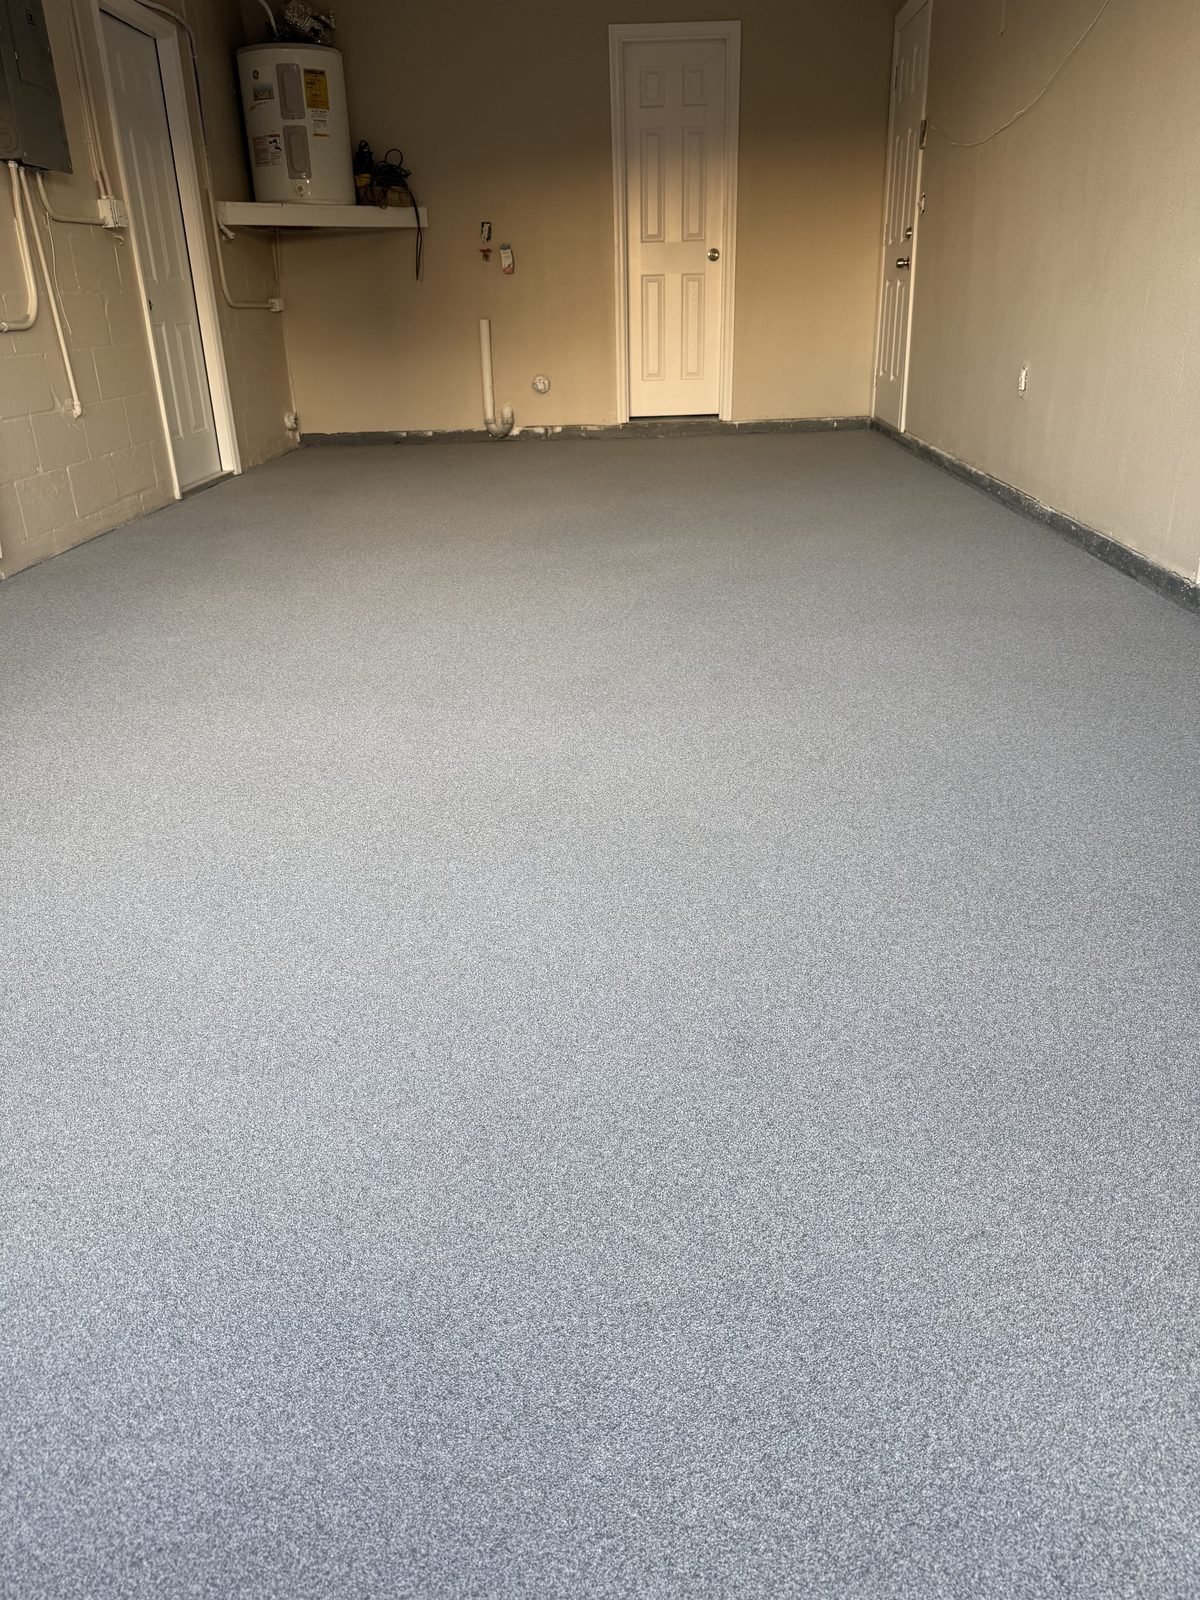
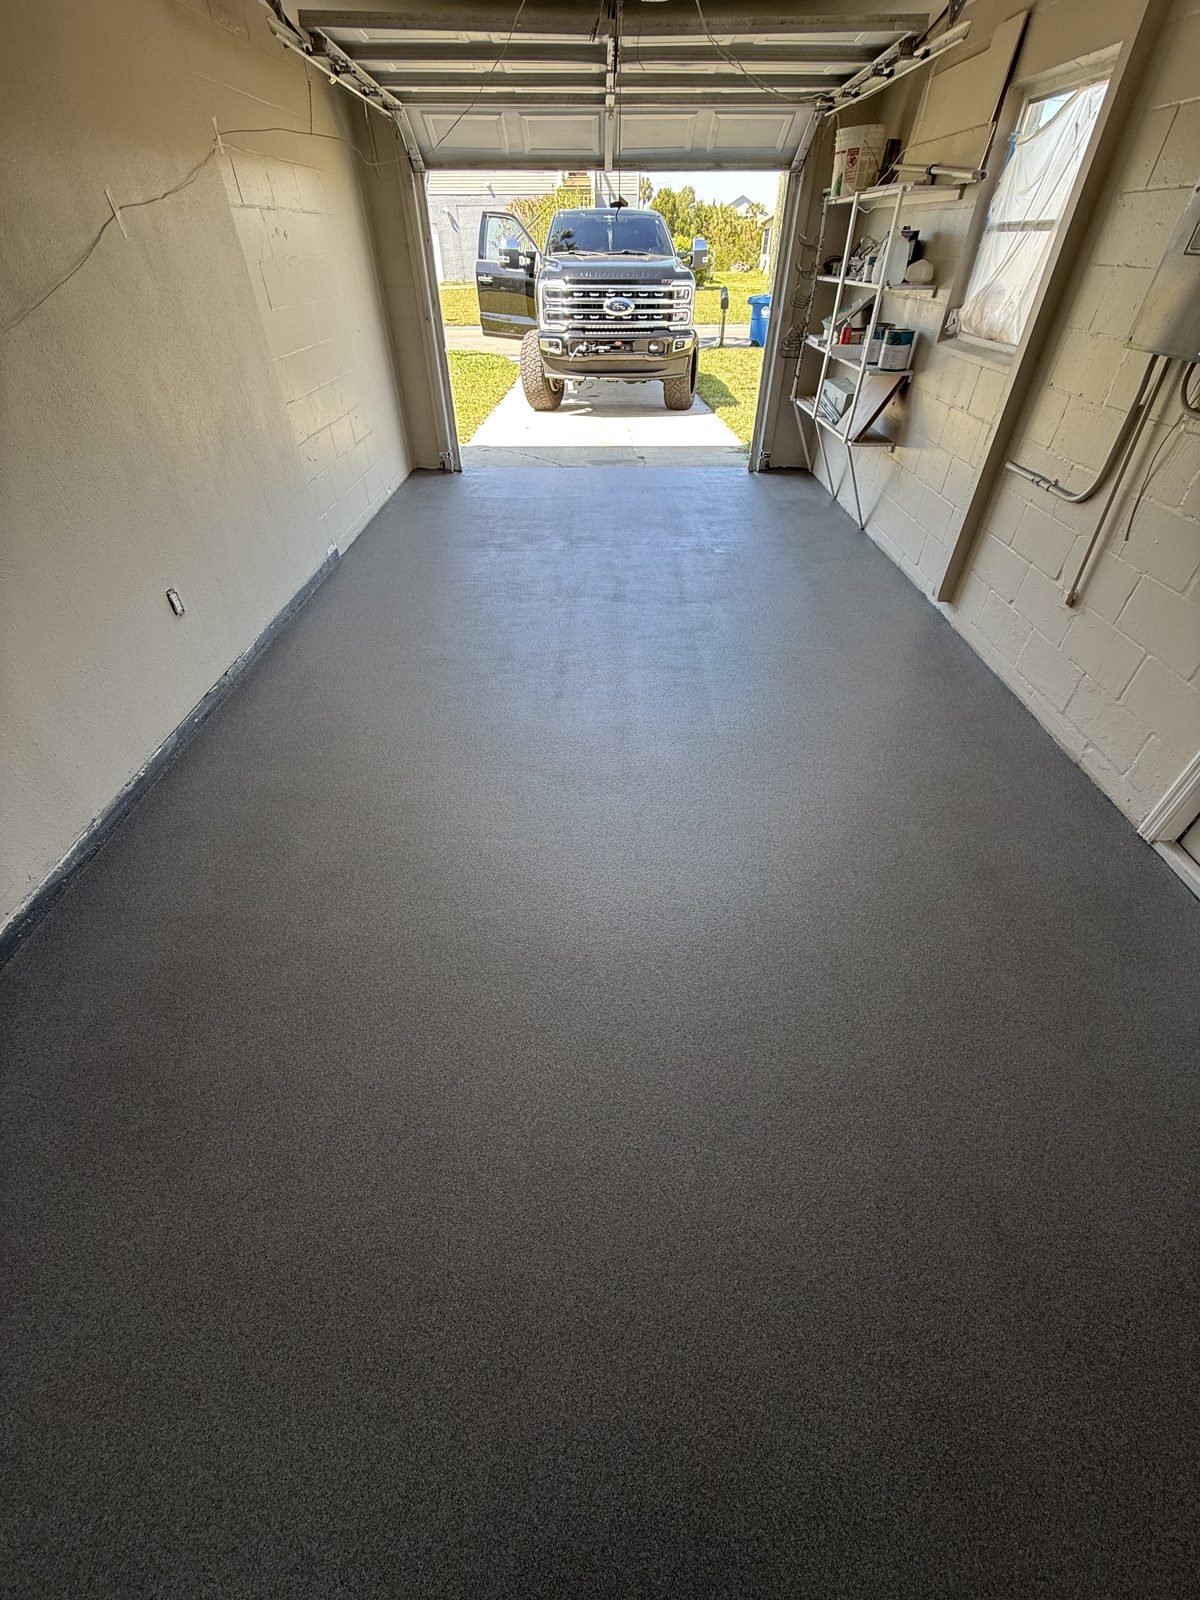
- UV-stable polyaspartic topcoat — protects against UV, abrasion, and chemical exposure
This multi-layer approach addresses every failure mode: moisture from below, UV degradation from above, and mechanical wear from daily use. It's the system John McGuire and the Proven Surfaces team install on every Florida garage floor — because anything less is a gamble with the homeowner's money.
On a high-moisture Florida slab, anything less than a full moisture mitigation system is a gamble with the homeowner's money. We don't gamble — we test, mitigate, and build systems that last.
Why DIY Epoxy Kits Fail in Florida
Walk into any big-box hardware store and you'll find garage floor epoxy kits for $80 to $300. The packaging shows a gleaming, showroom-quality garage floor. The instructions say it's a weekend project. What the packaging doesn't tell you is that these kits are engineered for the best-case scenario — a dry slab in a temperate climate with minimal moisture drive. In other words, the exact opposite of a Florida garage.
Here's why DIY kits fail in Florida, systematically:
No Moisture Testing
DIY kits don't include moisture testing equipment, and their instructions don't mention ASTM F2170 or ASTM F1869. The homeowner has no way to know whether their slab has a moisture problem — and in Florida, the answer is almost always yes. Applying a coating without testing is like building a house without checking the foundation.
Acid Etching Instead of Diamond Grinding
DIY kits include a bottle of acid etch solution and instruct the homeowner to mop it onto the concrete. Acid etching removes surface contaminants but does not create a sufficient Concrete Surface Profile (CSP) for long-term coating adhesion. Professional diamond grinding creates a CSP 2-3 profile with thousands of microscopic peaks and valleys. Acid etching creates a CSP 1 at best — smooth, shallow, and inadequate for 100% solids systems.
Water-Based Formulas
Most DIY kits use water-based epoxy — a resin system that contains 40-60% water by volume. When the water evaporates during curing, it leaves a thin, porous film riddled with microscopic voids. This porous film cannot block moisture vapor transmission. In fact, it acts almost like a membrane that allows moisture to pass through, accumulate at the weakest bond points, and lift the coating. A 100% solids epoxy, by contrast, cures to a dense, continuous film with zero voids and dramatically better moisture resistance.
Insufficient Film Thickness
A typical DIY kit produces a cured film thickness of 2-3 mils (thousandths of an inch). A professional 100% solids epoxy system builds to 15-20+ mils — roughly ten times thicker. Film thickness directly correlates with durability, chemical resistance, and moisture barrier performance. A 2-mil coating on a Florida slab is like putting a Band-Aid on a broken pipe.
| Factor | DIY Epoxy Kit | Professional Installation |
|---|---|---|
| Moisture Testing | None | ASTM F2170 & F1869 |
| Surface Prep | Acid etch (CSP 1) | Diamond grinding (CSP 2-3) |
| Film Thickness | 2-3 mils | 15-20+ mils |
| Moisture Barrier | None | Mitigation primer when needed |
| UV Protection | None or minimal | UV-stable polyaspartic topcoat |
| Warranty | None or 1 year | 5-year written warranty |
| Typical Lifespan | 6 months – 2 years | 15-20+ years |
| Cost | $80-$300 + your weekend | $5-$12 per sq ft installed |
The cost comparison is misleading on the surface. Yes, a DIY kit costs $200 and a professional installation costs $2,000-$4,000 for a two-car garage. But when the DIY coating fails in six months and you pay $3,000-$5,000 to have it professionally removed and replaced, the "savings" evaporate. You've spent more money, more time, and more frustration than if you'd done it right the first time.
The Professional Process: How Proven Surfaces Handles Florida Garage Floors
Every garage floor project at Proven Surfaces follows the same rigorous, science-driven process. There are no shortcuts. There are no "we'll skip the moisture test on this one" exceptions. Here's how it works:
Step 1: On-Site Assessment
John McGuire or a senior team member visits the property to evaluate the concrete condition, assess existing coatings (if any), check for cracks, spalling, or previous repairs, and discuss the homeowner's goals. During this visit, we also evaluate environmental factors — is the garage enclosed or open? Is there a vapor barrier visible at the slab edges? Has the homeowner noticed any moisture issues, efflorescence (white salt deposits), or previous coating failures?
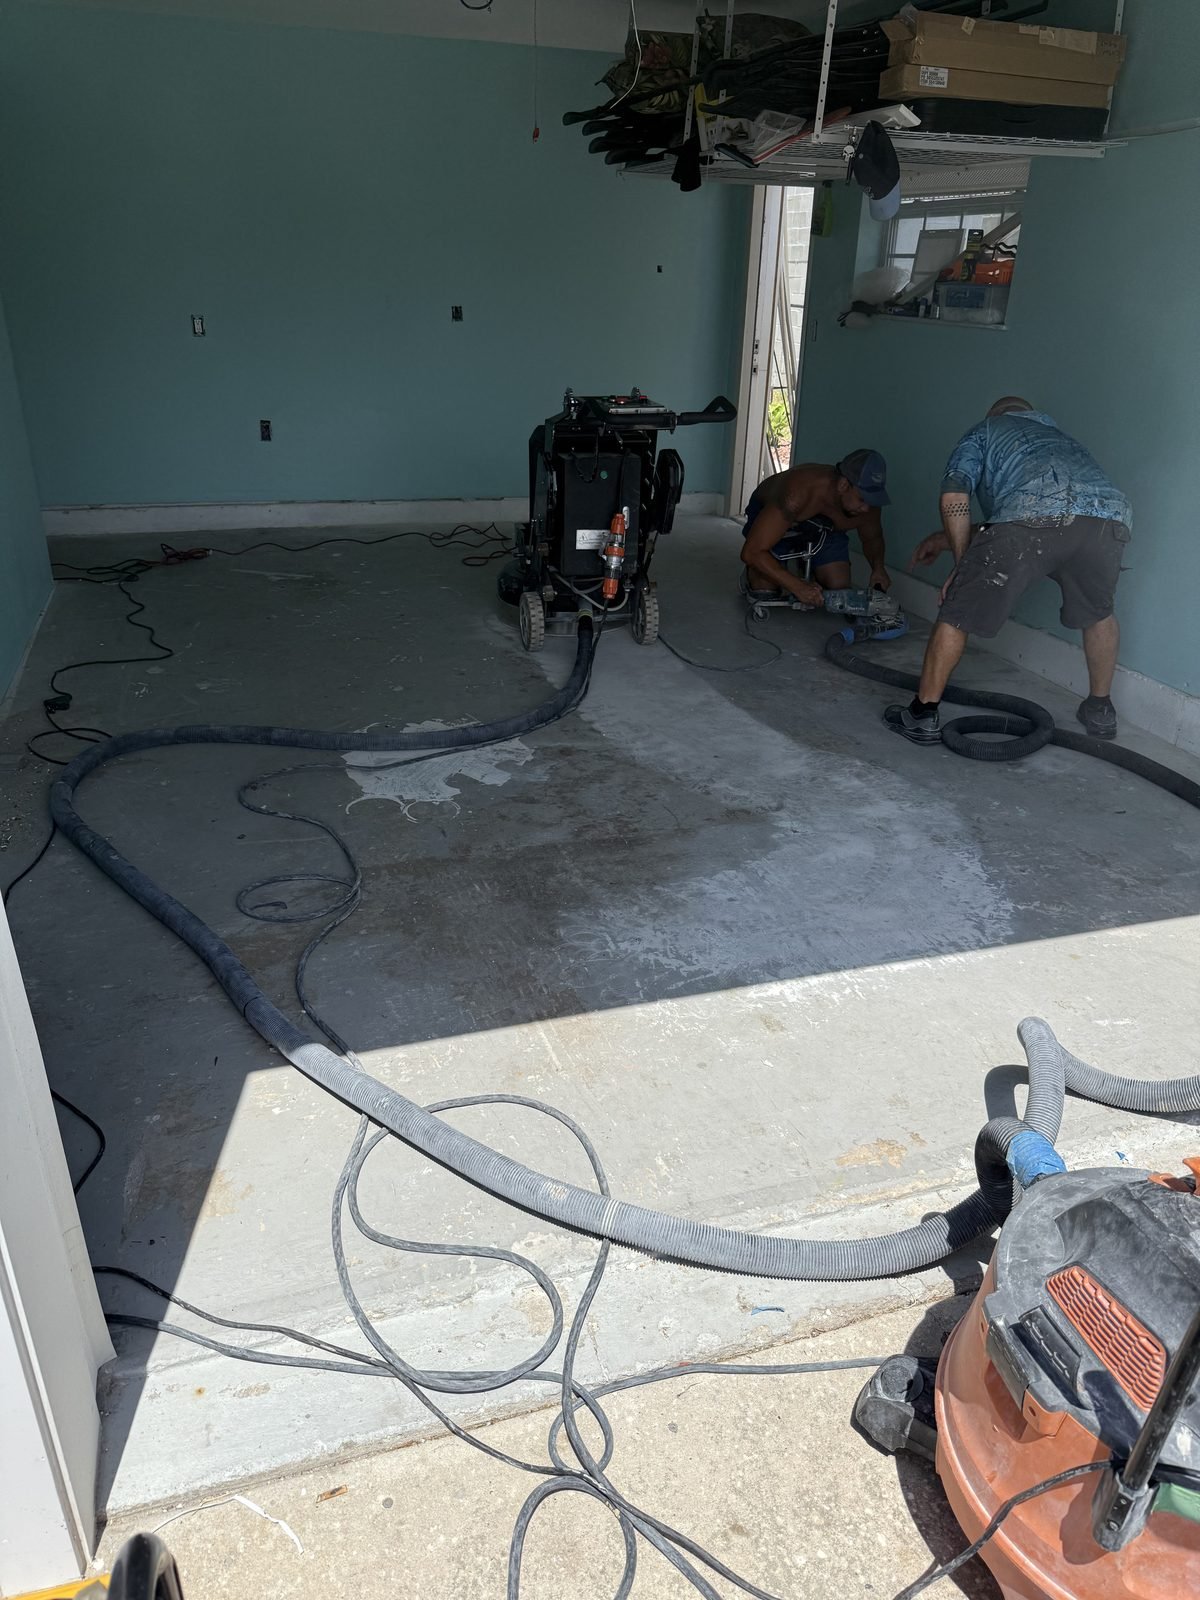
Step 2: Diamond Grinding
The concrete surface is mechanically ground using industrial diamond grinding equipment to achieve a CSP 2-3 profile. This process removes laitance (the weak, powdery top layer of concrete), opens the pore structure for primer penetration, and creates the rough mechanical profile that coating adhesion depends on. Any existing coatings, paint, or sealers are completely removed during this step.
Step 3: Moisture Testing
With the concrete freshly ground and the pore structure exposed, we conduct ASTM F2170 relative humidity testing. Probes are drilled into the slab at the prescribed depth and allowed to equilibrate. We also perform visual assessments — checking for darkened areas that suggest moisture migration and testing surface pH to detect alkaline conditions.
Step 4: Moisture Mitigation (If Required)
If RH readings exceed 75%, a moisture mitigation primer is applied before any decorative coating. This isn't optional. This isn't a judgment call. If the numbers say mitigation is needed, mitigation is applied. Period. The primer cures to form a vapor-impermeable barrier that protects every subsequent layer in the system.
Step 5: Coating System Installation
With the moisture barrier in place (or confirmed unnecessary through testing), the decorative coating system is installed — 100% solids epoxy base coat, decorative layer (flake, metallic, or solid color), and UV-stable polyaspartic topcoat. Each layer is applied within manufacturer-specified environmental conditions and cure windows.
Step 6: Final Inspection and Warranty
Every completed floor receives a final inspection for adhesion, coverage, uniformity, and finish quality. The homeowner receives a written 5-year warranty backed by the testing documentation and installation records that prove the system was installed to specification.
The Bottom Line: Moisture Is the Conversation Florida Homeowners Need to Have
If you're considering a garage floor coating in Florida — whether it's a two-car residential garage in Tampa, a three-car showpiece in Clearwater, or a commercial facility in St. Petersburg — the conversation needs to start with moisture. Not color. Not flake pattern. Not cost per square foot. Moisture.
Any contractor who doesn't mention ASTM F2170, who doesn't own moisture testing equipment, who doesn't include moisture mitigation in their proposal for Florida slabs — that contractor is either uninformed or cutting corners. Either way, the result is the same: a coating that will fail.
At Proven Surfaces, we've built our reputation on doing the work that other contractors skip. Moisture testing on every slab. Diamond grinding on every surface. Moisture mitigation when the numbers demand it. 100% solids epoxy and UV-stable topcoats on every installation. It's not the fastest approach. It's not the cheapest approach. But it's the only approach that delivers a floor you can trust for 15 to 20 years in Florida's unforgiving climate.
If you'd like to learn what's happening beneath your garage floor, call John McGuire at (727) 463-3174 or request a free on-site assessment. We'll test your slab, show you the numbers, and build a system that's engineered for your specific moisture conditions. No guesswork. No shortcuts. Just proven results.
The conversation needs to start with moisture. Not color. Not cost. Moisture. Everything else depends on getting this right first.
Frequently Asked Questions
Epoxy peels off Florida garage floors primarily due to moisture vapor transmission (MVT) through the concrete slab. Florida's high water table pushes groundwater upward through the porous concrete, creating hydrostatic pressure beneath the coating. This pressure breaks the bond between the epoxy and the concrete surface, causing sheets of coating to lift and peel. Without proper moisture testing and mitigation before installation, even the highest-quality epoxy systems will fail in Florida's extreme moisture environment.
The industry gold standard is the ASTM F2170 relative humidity test. Small holes are drilled into the slab to 40% depth, calibrated RH probes are inserted and sealed, and after a 72-hour equilibration period the probes measure the concrete's internal relative humidity. The older calcium chloride test (ASTM F1869) measures surface moisture vapor emission rate using a sealed dish on the concrete surface. For most coating systems, acceptable levels are below 75% RH per ASTM F2170 or below 3 lbs per 1,000 sq ft per 24 hours per ASTM F1869.
Yes, concrete floors with elevated moisture levels can be successfully coated using moisture mitigation systems. Specialized epoxy moisture barrier primers are applied directly to the prepared concrete to block vapor transmission before the decorative coating is installed. Professional-grade moisture mitigation primers can handle internal RH levels up to 100%. However, the moisture problem must be identified through testing and fully addressed before any decorative coating is applied — skipping this step guarantees premature failure.
DIY epoxy kits fail in Florida for multiple compounding reasons: they include no moisture testing equipment or protocols, they rely on acid etching instead of diamond grinding for surface preparation, they use water-based formulas that cannot block moisture vapor transmission, and they produce insufficient film thickness (2-3 mils vs. 15-20+ mils for professional systems). Combined with Florida's extreme year-round moisture conditions, high water tables, and tropical humidity, these limitations make DIY kit failure virtually guaranteed.
Ready to get started?
Get your free on-site moisture assessment and find out what's really happening beneath your garage floor.
Get Your Free Assessment →